Explain to students the different positions objects can occupy in relation to each other. Objects can be in the following positions: behind, beside, on top of, above, below, right, left, etc. Have students provide definitions of these terms: behind, beside, on top of, above, below, etc. As students say their definitions, write them on the board. Check student understanding of positional words and correct as needed.
Do a demonstration with four or five objects and a large book. Place the objects in different positions relative to the book. Ask students to call out what position the item is in, in the relation to the book. For example, put the book on the desk, and then hold one object above the book and ask students, “In what position is the object?” Students should answer as appropriate (e.g., above or on top of the book.) Repeat this process for each item and each position.
Activity 1: The Shape of Things
Give each student various geometric pattern blocks or tangrams and a large index card or sheet of paper. Tell students they are to use the blocks or tangrams to draw an object or picture using these shapes. Demonstrate to students how to trace around the blocks or tangrams onto the index card.
Then select students to describe their object. Have the selected student also describe the relationship of each block or tangram using positional terms. Collect the index cards from students to be used in the next activity.
Activity 2: Describing Pictures
Have each student take out one sheet of paper and a pencil. Place students in pairs and assign one student to be the describer and the other student to be the drawer. Students describe their picture card while their partner draws the picture without seeing the picture card.
Give each student an index card drawn in the previous activity. Tell students not to let their partner see their card. The describer tells the drawer what to draw and where to place the shapes, using positional terms to describe the placement of each shape. After the drawers have finished their pictures, they should compare their drawing with the card. Students should then exchange positions so that the describer becomes the drawer.
After you feel students have grasped the concept of an object’s position, have them complete the Where Is It? worksheet (S-3-4-2_Where Is It Worksheet and KEY.doc). Discuss the worksheet and the different position words they used today.
Extension:
- Students who might need an opportunity for additional learning can participate in a flash card assignment. Give each student 10 index cards.
1. Students write one position word on each card. A position word can include on top of, beside, above, under, behind, in, below, close to, far away, in front, in between.
2. Students look through magazines to find examples of the position words they chose, and then cut out and glue that picture on the back of the card that matches the word.
- Students who might need an opportunity for additional learning can participate in a picture assignment:
1. Give each student a picture, with one object marked in the picture.
2. The student should then write five sentences about the relation of the marked object to the other objects in the picture. For example:

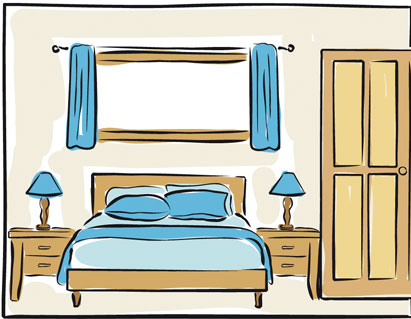
The following sentences would describe this picture, where the lamp with the arrow pointing at it is marked:
o The lamp is beside the bed.
o The lamp is on top of the nightstand.
o The lamp is below the window.
o The lamp is far away from the door.
o The lamp is close to the pillow.
- Students who may be going beyond the standards can create an art project showing an object in motion. The materials needed include tempera paint, a disposable pie tin, one marble, and paper.
Cut the paper to fit in the bottom of the pie tin. Have student dip the marble into tempera paint. Place the marble on the paper and move the pie tin around so that the marble moves in different directions. Allow the paper to dry and have students write a paragraph describing the motion of the marble during the activity.
